-
Empty cart
No products in the cart.
Return to Shop
Mastering DTF Applications
Transform your apparel with our professional DTF transfers – easy application, stunning results
DTF Applications: Endless Possibilities for Your Garments
Welcome to our comprehensive guide on applying Direct to Film (DTF) transfers! If you’ve just received our premium DTF prints or are considering them for your next project, you’re in the right place. In this blog, we’ll walk you through everything from basic application techniques to advanced methods that will help you achieve professional results with vibrant colors and incredible durability.


What Makes DTF Transfers Special?
DTF transfers represent the perfect blend of quality and convenience. Created by printing designs onto special PET film and coated with adhesive powder, they offer vibrant colors, incredible detail, and exceptional durability once applied to your garments. The best part? They work on virtually any fabric!
Understanding Your DTF Transfers
Before applying your DTF transfers, it’s important to understand what makes them unique. Each transfer consists of your design printed in vibrant, water-based inks on a special release film, with a layer of adhesive powder that’s been heat-cured to the ink.
When you apply heat and pressure, this adhesive melts and bonds with your fabric while the carrier film releases cleanly. The result? A transfer that becomes part of the garment, offering exceptional stretch, vibrant colors, and wash durability of 50+ cycles without cracking or fading!
Why Choose DTF Applications
Unlike traditional heat transfers or vinyl, DTF offers incredibly soft hand-feel with zero hand on light colored garments and minimal hand on dark fabrics. There’s no need for weeding complex designs, and you’ll enjoy exceptional detail with the ability to achieve photorealistic results on virtually any fabric type!

Setting Up Your Application Workspace
Creating the perfect environment for applying DTF transfers is crucial for consistent, professional results. From heat press setup to workspace organization, every element makes a difference in your final product.
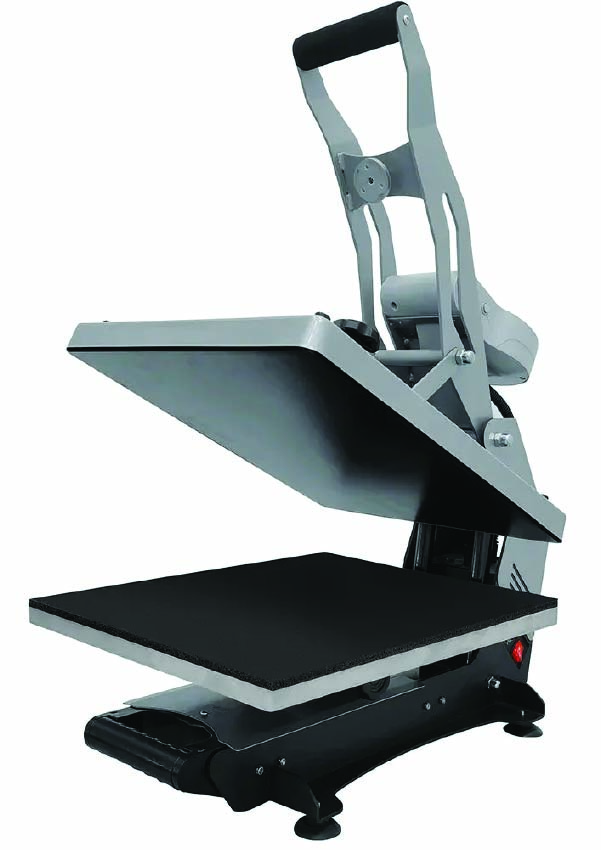
Essential Equipment for Perfect DTF Application
Ready to apply your DTF transfers? Let’s talk about the essential gear you’ll need. The foundation of any DTF application setup is a quality heat press that can provide consistent temperature and pressure across the entire surface. While commercial presses offer the best results, even a good home heat press can work wonderfully when properly calibrated.
In addition to your heat press, you’ll want to have heat-resistant tape (for positioning your transfers), a lint roller (to clean garment surfaces), a Teflon sheet or parchment paper (to protect your press and garment), and a heat-resistant mat for your workspace. For multi-part applications or layering, alignment tools can be incredibly helpful.
When using a heat press, ensure it’s properly preheated for at least 5 minutes before application. This ensures even heat distribution and prevents cold spots that can lead to transfer failures.
Perfect DTF Application: Step-by-Step Guide
Applying DTF transfers properly is key to achieving professional results that last. Follow this comprehensive guide to ensure perfect adhesion every time:
- Prepare your garment – Pre-press your fabric for 3-5 seconds to remove moisture and wrinkles. This creates a smooth, flat surface and helps achieve better adhesion. For best results, ensure your garment is clean and lint-free using a lint roller.
- Position your transfer – Place your DTF transfer on the garment with the printed side facing down (adhesive side against the fabric). If needed, secure with heat-resistant tape to prevent movement during application. For precise placement, measure and mark your position before applying.
- Apply heat and pressure – Set your heat press to 290°F (143°C) and press for 8 seconds with medium-firm pressure. Our DTF transfers are hot peel, which means you’ll remove the carrier film while it’s still warm for best results.
- Peel the carrier film – Once pressed, immediately remove the carrier film with a smooth, consistent motion. Pull the film back against itself at a 180° angle rather than lifting straight up for the cleanest release.
- Optional second press – For maximum durability, cover the applied transfer with a Teflon sheet and press again for 3-5 seconds. This “post-press” helps the adhesive fully penetrate the fabric fibers for optimal bonding.
Application Temperature Tips
Different fabrics may require slight adjustments to your heat press settings. For delicate materials like nylon or silk, reduce temperature to 275°F and increase time to 10-12 seconds. For heavy cotton blends or polyester, the standard 290°F for 8 seconds works perfectly in most cases.
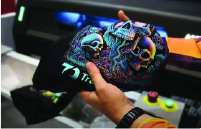
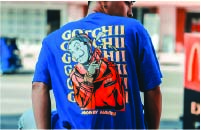
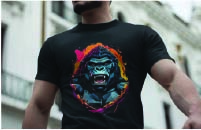
Stunning Examples of DTF Applications
Be inspired by these incredible DTF application examples that showcase the versatility and vibrancy of our premium transfers:


Troubleshooting DTF Application Issues
Even with the best preparation, challenges can sometimes arise. Here are solutions to the most common DTF application problems:
Incomplete Transfer Issues
If parts of your design aren’t transferring completely to the garment, your heat press temperature or pressure might be insufficient. Ensure your press is properly calibrated and reaching 290°F throughout the entire surface. Also check that you’re applying firm, even pressure—uneven pressure is the most common cause of partial transfer failures.
Carrier Film Sticking
If the carrier film is difficult to remove or sticks to the design, you may be peeling at the wrong temperature. Remember that our transfers are hot peel—wait about 2-3 seconds after pressing, then peel while still warm. If you wait until the film cools completely, it may adhere to the design and become difficult to remove.
Washing Durability Concerns
To ensure maximum durability through washing, always wait at least 24 hours after application before washing the garment. This allows the adhesive to fully set. When washing, turn the garment inside out, use cold water on a gentle cycle, and avoid harsh detergents or bleach. Tumble dry on low heat or hang to dry for best results.
Cracking or Peeling After Washing
If you notice any cracking or peeling after washing, it likely indicates insufficient heat during application. Try increasing your press time by 2-3 seconds or adding a second press with a Teflon sheet covering the transfer. This helps ensure the adhesive fully penetrates the fabric fibers for a permanent bond.
Our DTF Transfers are Hot Peel. Set your heat press temperature to around 290°F (143°C) and press for 8 seconds with medium-firm pressure for optimal results. Immediately peel the carrier film while still warm.